After last 3 weeks environment related settings, we are ready to make our hands dirty on creating Azure code. Isn’t it cool !!!
Since 1987 of my higher secondary computer lesson (proud to be earlier computer students in India), we used to learn the computer language using the famous ‘Hello World’ program right from quick basic, fortran, cobol, pascal, lisp, c, c++, vc++, java, c#, etc. Same old coding formulae/masala!
After the proper installations of VS2010, AzureSDK, IIS, etc. the hello azure application is created in few seconds with the built-in wizard navigation. Quite simple steps to create the first azure application with the above set up:
- Launch Visual Studio 2010 as administrator.
- Click File New Project, from the Visual C# installed Cloud templates.
- Create Windows Azure Project with the solution name ‘HelloAzure’.
- Thatz it; just click OK to launch a wizard.
- From the wizard, add the ASP.NET Web Role in C# with ‘HelloAzure_WebRole’.
- Run it (Ctrl+F5) and got the output ‘Hello Azure Application’.
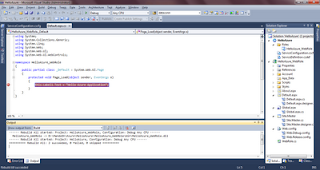
Next week, I’ll talk about the interesting topic on Emulators in Azure development platform. Now, letz have a deep dive in the auto generated code piece (in the snap shot). Itz a simple web role (web application) and so 2 projects within the solution namely HelloAzure_WebRole and HelloAzure.
The first project HelloAzure_Webrole is quite simple like other ASP .NET application, comprises of site.master, global.asax, web.config, App_Data, Default.aspx, etc. One new entity is ‘WebRole.cs’ which is the entry point for Azure web role app as public class WebRole : RoleEntryPoint HelloAzure project is new concept. It contains three major components. A) HelloAzure_WebRole configuration, b) ServiceDefinition.csdef and c) ServiceConfiguration.cscfg They are the discussion points for next blog entry. Until then, happy cloud coding!

